
Activate trade-in in RepairCMS and buy devices
On this page · 12 sections
Trade-in lets you buy used devices from private sellers in RepairCMS. You record the device, check its condition and the seller’s ID, set the price and have the seller sign the purchase contract on screen. Then you pay out, add the device to your stock and print its label. Each trade-in gets a sequential number in your trade-in list.
Trade-in is included in the RepairCMS Team and Enterprise plans at no extra cost. Cash payouts need a connected helloCash POS.
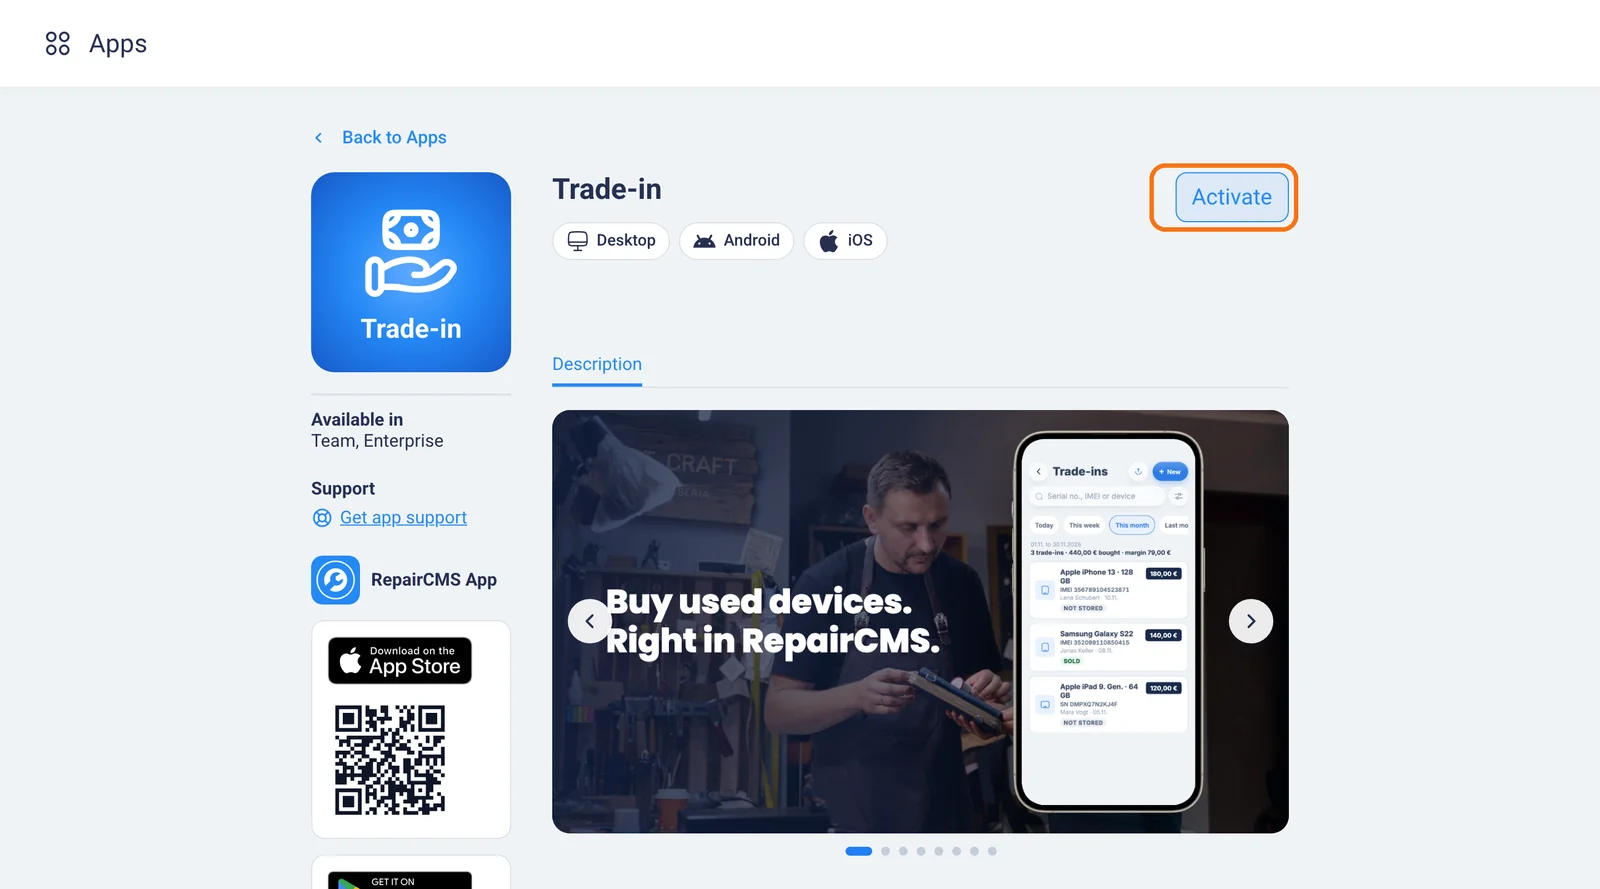
Activate Trade-in
- Open “Apps & Integrations” and click the “Trade-in” tile. The direct link is https://my.repaircms.com/integrations/trade-in
- Click “Activate”.
“Trade-in” then appears in the sidebar for every user with permission to use it. You can use Trade-in on your computer and in the RepairCMS app.
Start a new trade-in
There are three ways to start.
- Click “Trade-in” in the sidebar, then “New trade-in”. You can also reach the list at https://my.repaircms.com/trade-in
- Click the plus button at the top and choose “New trade-in”.
- Continue a draft from the “Drafts” tab. RepairCMS saves your entries as a draft every time you click “Next”. A draft from the web app can be finished in the RepairCMS app, and the other way round.
First, choose the device type. The tiles show your business’s device types, and “New type” adds another one. The type sets which number you record, which checks come up and which accessories are suggested. To manage device types, see Activate custom repair device types.
Step 1: Record the device
- Enter “Brand” and “Model”, and “Storage and colour” if needed.
- Scan or type the device number. For a smartphone this is the IMEI, for a laptop the serial number, for an e-bike the frame number.
- Click “Next”.
When you click “Next”, RepairCMS checks the number.
- It spots a mistyped IMEI by its last digit, which is a check digit.
- If the device is still in your stock, you can’t continue. Click “Open article” to see it.
- If an earlier trade-in has the same number, RepairCMS shows that trade-in’s number and date. You can still continue.
Step 2: Condition and checks
- Choose the condition: “Like new”, “Very good”, “Good”, “Used” or “Defective”.
- Enter “Known defects”, for example scratches on the frame.
- Tick the accessories that come with it, such as a charging cable or the original box.
- Upload up to eight photos of the device.
- Under “Check before buying”, tick all required checks. For a smartphone, that includes seeing for yourself that Find My or the Google account is signed out.
Step 3: Seller and ID
- Find the seller by name, company, phone or customer number, or click “Create a new customer”.
- Check the address and birth date. The seller must be at least 18.
- Choose how the seller sells: “Private person”, “Small business” or “Business, margin scheme”.
- Choose the ID type and fill in “ID number”, “Issuing country” and “Valid until”. An expired ID blocks the trade-in.
On a computer, you type the ID details. In the RepairCMS app, the camera reads them from the ID without saving a picture. The ID number only appears in the contract. It isn’t a search field and isn’t part of the export for your tax advisor.
If the seller is a business that charges VAT, the trade-in stops here. That purchase needs an invoice from the seller.
Step 4: Price and payout
- Enter the “Purchase price”. It doesn’t include VAT.
- Choose the payout: “Bank transfer” or “Cash from the register”.
With a bank transfer, you pay the seller yourself and the register stays unchanged. Cash only works with a helloCash POS connected at this location. RepairCMS then shows how much cash is in the register and how much is left afterwards, and books the payout as a withdrawal. If there isn’t enough cash, choose a bank transfer or a lower price. To connect the register, see Set up helloCash POS.
For cash payouts of €10,000 or more, RepairCMS asks you to confirm, because money laundering rules apply. For precious metals, this starts at €2,000.
Step 5: Read and sign the contract
- Let the seller read the purchase contract on screen to the end.
- The “Sign” area then appears. The seller signs there with a finger or a pen.
- Click “Complete trade-in”. The button shows the amount as well.
RepairCMS fills in the contract with everything you entered in the earlier steps. The text is a template from RepairCMS. You’re responsible for the contract with your sellers, so check the text for your business before you use it. Your company details in the contract header come from your company profile.
After completing: store the device and print the label
When the trade-in is complete, you see “Trade-in completed” and the payout.
- Click “Store as article”.
- Enter the “Sale price” and choose the “Storage place”. RepairCMS shows you the margin.
- Keep “Print article label” ticked. The label shows the barcode, sale price and IMEI or serial number.
- Click “Store and print label”.
Print the contract as A4 with “Print the contract”, or send it to the seller with “Email the contract”. The seller’s copy shows the ID number shortened.
When you resell a device under the margin scheme, write a separate invoice for it. Margin scheme devices can’t be sold for cash or through the register. To write invoices, see Create invoices from repair orders.
Trade-in list and export
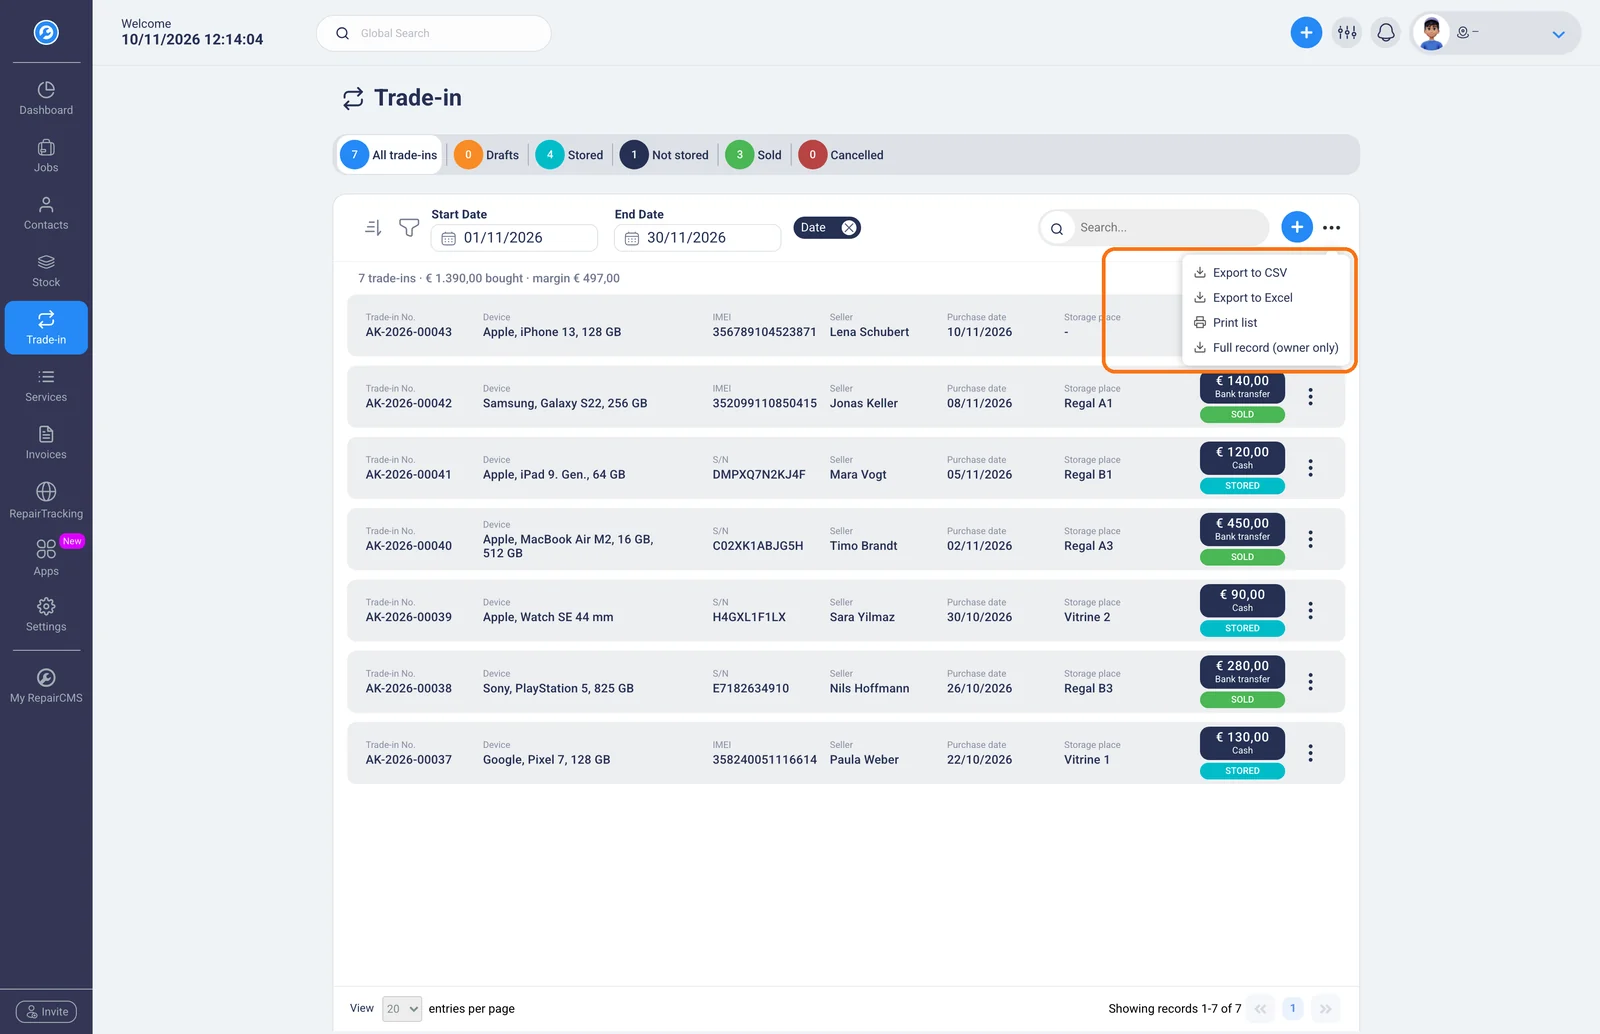
The “Trade-in” list shows all your trade-ins. At the top, choose “All trade-ins”, “Drafts”, “Stored”, “Not stored”, “Sold” or “Cancelled”. At the bottom you see the count, the purchase total and the margin.
- Pick a period, and use “Date applies to” to choose whether it filters by purchase date or sale date.
- A serial number search covers all periods.
- Use “Export as CSV”, “Export as Excel” or “Print list” to get the list for your tax advisor. The export contains exactly the trade-ins in your current filter.
- As the owner, you can also export the “Full record (owner only)”.
Cancel a trade-in or correct the price
A completed trade-in can’t be edited. As the owner or an admin, open it and choose one of two ways.
- “Cancel trade-in”: You enter a reason. The contract stays saved and counts as cancelled. If the device is in stock, RepairCMS takes it out. If the seller returned the cash, tick the matching box and RepairCMS books the amount back into the register as a deposit. A cancellation can’t be undone.
- “Correct the price”: RepairCMS cancels the trade-in and starts a new one with all details. You enter the correct price, the seller signs again and the trade-in gets a new number.
Once the device is sold, the trade-in can no longer be cancelled. To set who has which rights, see Manage user permissions.
What’s next
If you’d rather buy devices on your phone or tablet, read Buy used devices in the RepairCMS app.
Frequently Asked Questions
Where do I turn on trade-in in RepairCMS?
Open “Apps & Integrations”, click the “Trade-in” tile and then “Activate”. “Trade-in” then appears in the sidebar. Trade-in is included in the RepairCMS Team and Enterprise plans at no extra cost.
What does the purchase contract include?
RepairCMS fills the contract with your company details, the seller and their ID, the device with its IMEI or serial number, the condition, the accessories, the price and the payout. The seller reads it to the end and signs on screen. The text is a template from RepairCMS, so check it for your business before you first use it.
How do I export my trade-in records?
Open “Trade-in” in the sidebar and filter by period or status. Then choose “Export as CSV”, “Export as Excel” or “Print list”. The export for your tax advisor contains no ID numbers.
Can I pay the seller in cash?
Yes, if a helloCash POS is connected at your location. RepairCMS then books the payout as a withdrawal in the cash book. Without a register, you pay by bank transfer.
Did this guide help you?