
Set up the HelloCash POS
On this page · 14 sections
The HelloCash register is currently in Early Access and included from the Starter plan. It signs cash and card payments, with a TSE in Germany and under RKSV in Austria. You need a HelloCash account on the Premium plan for each location, plus the TSE fee. The guided setup starts in test mode, and real receipts only begin once you switch over.
What you need first
- A HelloCash account on the Premium plan, one per location. The interface RepairCMS uses to talk to HelloCash is included from that plan.
- Fiscal signing on your HelloCash account. Without active signing (TSE or RKSV) the register can’t complete receipts. This is where the TSE fee comes in. RepairCMS charges neither the HelloCash plan nor the TSE fee. It still isn’t free, because you pay the HelloCash plan directly to HelloCash.
- A location in Germany or Austria. The register signs cash and card payments, through a TSE in Germany and under RKSV in Austria.
- A RepairCMS plan from Starter.
Get your API token from HelloCash
- In HelloCash, open the settings, then “General” and “helloCash API”. In the setup, RepairCMS gives the path as “Cash register”, “Settings”, “General”, “helloCash API”.
- Click “Generate token”.
- Copy the token. You’ll need it in RepairCMS in a moment.
Step by step: connect the register to HelloCash
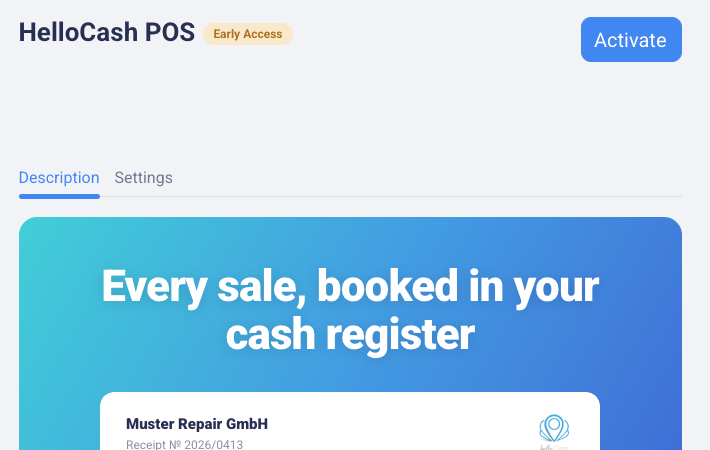
- Click “Apps” in the sidebar, then the “HelloCash POS” tile. The app page carries an “Early Access” badge and has the “Description” and “Settings” tabs.
- Click “Activate”. Under “Which location are you connecting?”, pick the location and click “Start setup”.
- Connect your helloCash account: Paste the token into “API bearer token” and choose “Country / fiscal mode”. Click “Verify & connect”. RepairCMS shows “Connection verified”.
- Who signs the receipts? Choose “One shared cashier for all receipts” or “Match each RepairCMS user to a helloCash employee”. With the second option, every receipt carries the name of whoever took the payment.
- Who can use POS? Tick the team members who may open and operate the register. You can also change this later in “Team Members”.
- Map your payment methods. RepairCMS pre-matched what it could. Each payment method needs a matching payment type in HelloCash.
- Try it before it counts. Click “Send a test receipt”. The test receipt shows up in HelloCash with a test flag and stays out of your real reports.
- Click “Activate in test mode”. RepairCMS shows “… is connected”.
You can pause the setup, your progress is saved. Connect several locations one after another, each with its own HelloCash account and token.
The country sets the signature procedure. It can’t be changed after activation.
If a payment method is missing, create it in HelloCash under “Cash register”, “Settings”, “General”, “Payment types”, then click “Refresh list” in RepairCMS.
A dedicated “RepairCMS” employee in HelloCash keeps bookings from RepairCMS easy to tell apart in your HelloCash reports.
Check it in test mode
Test mode creates no fiscal receipts. Ring up a few test sales and check the test receipts in HelloCash: items, taxes and payment types. At the register the pay button then reads “Pay & print TEST receipt”, so you always know you’re still testing.
Go live
Before going live, RepairCMS shows the “Before you go live” checklist:
- “Register connected to this location”
- “Cashiers mapped”
- “Fiscal signing active (TSE / RKSV)”. If it says “Not confirmed yet”, a test receipt confirms signing.
- “Opening cash float counted”. This one is required, count it with “Count now”.
- “Payment methods mapped”
- “Printer reachable · test receipt verified”
Then switch with “Switch to live” and confirm “Switch this register to live?”. From the next sale on, receipts are fiscally signed. Live applies to the whole location, every register there follows this switch. Only shop owners can switch modes, and RepairCMS logs the change with name, time and register.
You can archive your test receipts with “Archive them (recommended)”. RepairCMS only offers “Delete them permanently” while the register has never been live.
Once live, RepairCMS signs cash and card payments wherever you enter them, including when a customer pays a job invoice in cash or by card.
Card payments
Under “Which terminal takes card payments at this register?” you choose exactly one card path.
“Own external terminal” is marked as the default:
- Charge the card on your own terminal.
- Confirm the payment in RepairCMS once your terminal shows it as approved.
- RepairCMS prints the signed receipt.
RepairCMS can’t see what happens on your terminal and doesn’t move any money. At the end of the day, compare the terminal’s own report with the card total in RepairCMS. These payments show in the day-end closing under “Non-cash (not in the drawer)”.
“Provider reader” starts the payment on a connected SumUp terminal. To pair a SumUp Solo:
- Log the terminal out of the SumUp account.
- Connect the terminal to Wi-Fi.
- On the terminal, select “API” and then “Connect”. A pairing code appears.
- Enter the code in RepairCMS under “Pairing code” and click “Pair terminal”. The code is valid for about five minutes.
Receipt printer
You set up the receipt printer in the register settings under “Hardware & printing”.
- Under “Printer brand” you pick Epson or Star. For Star, the TSP100III and TSP143III models aren’t supported.
- As print methods the register offers “Network (ePOS / WebPRNT)”, “System print dialog”, “USB (WebUSB)” and “Print agent (QZ Tray)”.
- With “Print receipt automatically after payment”, the receipt prints as soon as the signed receipt comes back.
- “Print test receipt” checks that everything comes out readable.
If a receipt doesn’t print, the payment is still complete and the receipt is signed. Print it again, or send it by email or as an A4 PDF.
Day-end closing
- Count: Count the drawer in RepairCMS. If the amount differs, add a “Difference note”. RepairCMS saves your count before moving on.
- Z-report: Create the Z-report in HelloCash. RepairCMS can’t do this through the interface and takes you there.
- Confirm: Back in RepairCMS, confirm “Day-end closing done in helloCash?” with “Yes, close the day”. The day is archived.
You’ll find your closings under “Closing history”, each with a report and a printable PDF.
After the sale
When you ring up a repair job, the receipt appears on the job’s “Invoice” tab. From there you reprint it, download it, email it or cancel it. If you cancel an invoice in RepairCMS, RepairCMS creates the matching cancellation in HelloCash.
If the HelloCash register is active, invoices paid in cash or by card get a register receipt in HelloCash. RepairCMS doesn’t send those invoices to Lexware. Invoices paid by bank transfer don’t go to HelloCash. They stay regular RepairCMS invoices and go to Lexware as usual.
If HelloCash is briefly unreachable
Cash sales keep going. The receipt prints with a note about retroactive signing, RepairCMS marks it as waiting and signs it automatically once the connection is back. While receipts from today are still waiting to be signed, the day can’t be closed. Your count stays saved, and RepairCMS reminds you once closing is possible. If HelloCash actually rejects a sale, the register stops that sale.
If a receipt comes back without a signature
This is different from a connection outage. The sale went through, but the receipt came back without a signature. RepairCMS then shows “We do not know whether your sales are being signed”, and until a receipt comes back signed:
- The register completes no further sales.
- Cash and card are refused on the invoice too. You can still settle invoices by bank transfer or leave them open.
- Day-end closing stays blocked.
- The sale that triggered this isn’t lost, and everything already signed stays signed.
The register keeps checking by itself, and the next receipt that comes back signed clears the state. “Contact support” gets you straight to us.
Replace the token or deactivate HelloCash
- If HelloCash rejects the stored token, RepairCMS shows “HelloCash authentication invalid”. Use “Reconnect” or “Replace token” to add a new token. Your settings stay as they are.
- “Deactivate helloCash” switches the register off. Existing fiscal receipts are preserved, and new invoices are no longer processed through HelloCash.
If you’d rather not do the setup yourself, add the “Kassen-Setup” onboarding service when you upgrade your plan. It covers the account, the TSE or RKSV registration, the connection to RepairCMS and a test receipt.
What’s next
- What happens to your other invoices in accounting is covered in Connect Lexware Office and send your invoices.
- You’ll find more connections under Apps & Integrations.
- Recent changes to the register are listed in the release notes.
Frequently Asked Questions
What does the HelloCash register cost?
The register is included from the Starter plan. You need a HelloCash account on the Premium plan for each location, plus the TSE fee. RepairCMS charges neither, you pay the HelloCash plan directly to HelloCash.
Where do I find the API token?
In HelloCash under “Cash register”, “Settings”, “General”, “helloCash API”. Click “Generate token” there.
Can I try the register without creating real receipts?
Yes. Setup starts in test mode. Test receipts carry a test flag in HelloCash and stay out of your reports. You only go live with “Switch to live”.
Do register receipts go to Lexware Office?
No. If the HelloCash register is active, invoices paid in cash or by card get a register receipt, and RepairCMS doesn't send those invoices to Lexware. Invoices paid by bank transfer don't go to HelloCash. They stay regular RepairCMS invoices and go to Lexware as usual.
Did this guide help you?