
Set up your business and choose a plan
On this page · 7 sections
Right after creating your account, you choose whether to start with the 14-day trial or with Go. Then the RepairCMS app asks for your company name, industry, logo, contact details and opening hours. These details later appear on job sheets, labels and in the tracking portal. Finally you create a test job with yourself as the customer and open the real tracking portal.
What you enter and where it shows up
| Detail | Appears on |
|---|---|
| Company name | every job sheet and the tracking portal |
| Industry | device types, templates and examples in the app |
| Logo | every document and the device label |
| Contact and address | documents and the tracking portal |
| Opening hours | the tracking portal |
| Bank details | invoices (invoices from Starter) |
Step by step: choose a plan
After the confirmation code, the app shows “Almost there” and “All that’s left is deciding how you start.” Neither option needs payment details.
Option 1: Try everything for 14 days
- Tap “Try everything for 14 days” (marked “Recommended”). The list above shows everything the trial includes.
- Tap “Start the trial”.
- Check your email address. Tick “RepairCMS may send me emails. Can be unsubscribed at any time.” and tap “Start the trial” again.
The trial gives you 14 days of everything in the Team plan, including invoices, quotes, stock, team and photos on the job. Then it ends by itself, no subscription, and you’re on Go.
Option 2: Start with Go
- Tap “Start for free with Go”. Below it you see “Free, 15 jobs a month”.
- Tap “Start with Go”.
The list above shows what Go includes. Scroll on and “Not included in Go” lists everything the trial and the paid plans add. More in RepairCMS Go: what’s included and what isn’t.
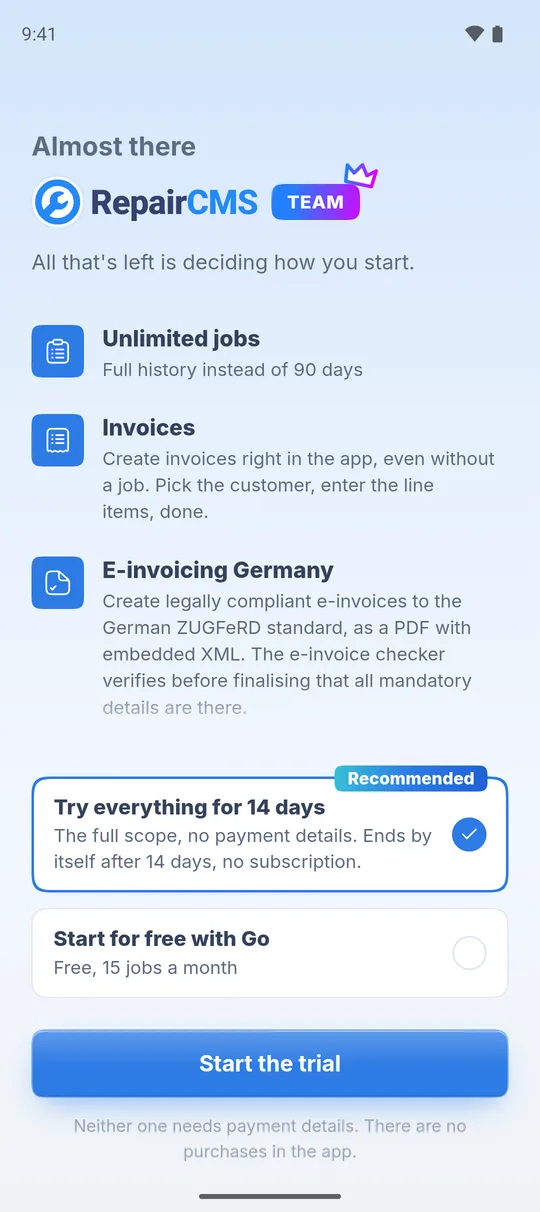
Start the trial later: If you start with Go, you can still start the 14-day trial at any time. Tap “Try free for 14 days” under “More”. If you have used the trial before, the plan choice only shows Go.
Step by step: set up your business
At the top the app shows which of the 8 steps you’re on. The account was step 1.
- “What’s your business called?” Enter the “Company name” and tap “Next”.
- “What do you repair?” Pick your “Industry”, for example “Smartphone & tablet”, “E-bike”, “Watchmaking” or “Electronics”. If nothing fits, pick “Other” and type your industry in the field. Tap “Next” or “Choose later”.
- “Upload logo” Tap “Choose a logo” and pick an image from your gallery. PNG or JPG, at least 300 pixels wide. Without a logo, tap “Continue without a logo”.
- “Contact & address” Enter “Phone”, “Email”, “Web” and the “Address” with postcode and town. The email from your account is already filled in, you can change it. While you type the street, the app suggests matching addresses. Tap “Next” or “Add contact details later”.
- “Opening hours & bank details” Tap “Opening hours” or “Bank details” and fill in what you have to hand. Tap “Done” or “Add both later”.
- “Three permissions from your device” Allow “Local network” and “Bluetooth” so the app can find printers, and “Notifications” for new jobs and messages. Tap “Allow” for each, then “Next”. If a permission is still open, the button says “Allow the rest later”. “Allow all later” moves on without permissions.
- “Connect a printer” Tap “Search for printers”. Next to your printer, tap “Connect” and then “Test print”. Once the test print has gone out, the button at the bottom says “Connect the printer and continue”. Without a printer, tap “Continue without a printer” or “Set up later”. This step only connects printers on Wi-Fi. A Bluetooth printer you connect afterwards under “More”, “Settings”, “Printer settings”. More in Connect a printer and print a test page.
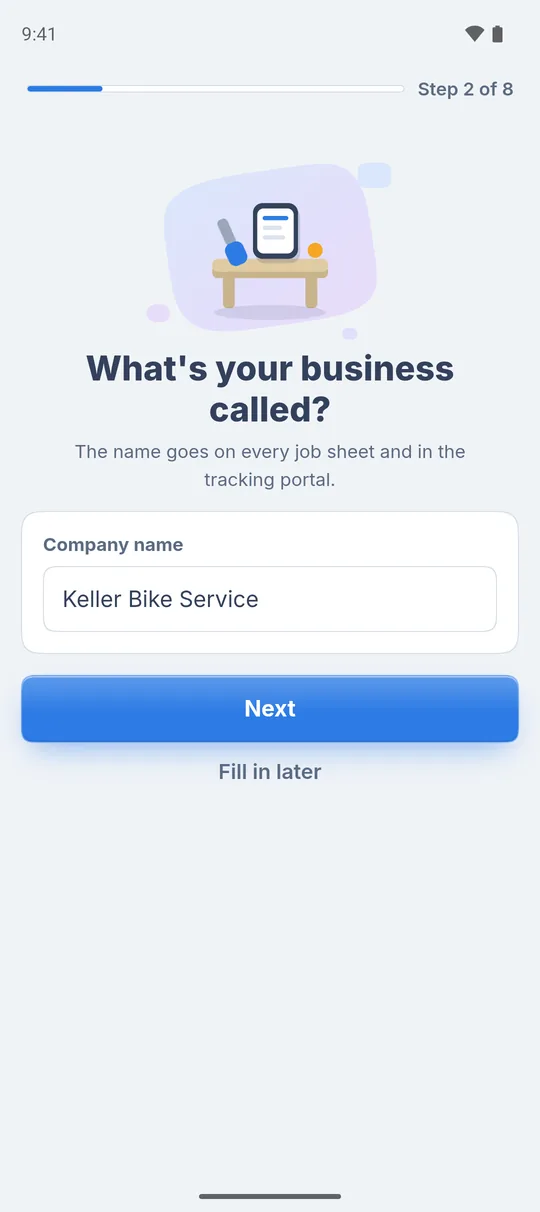
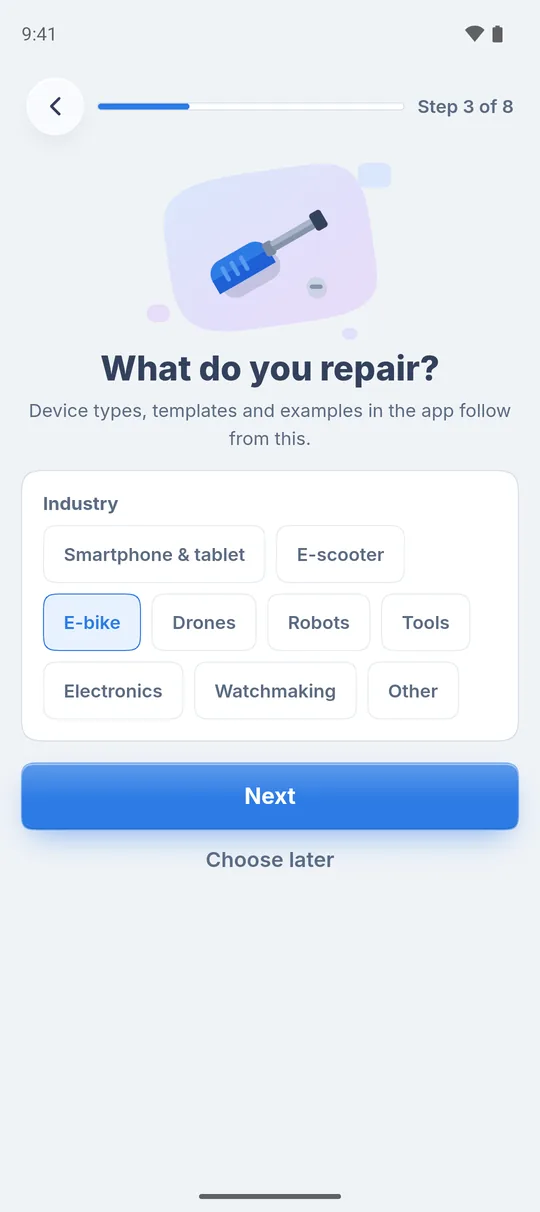
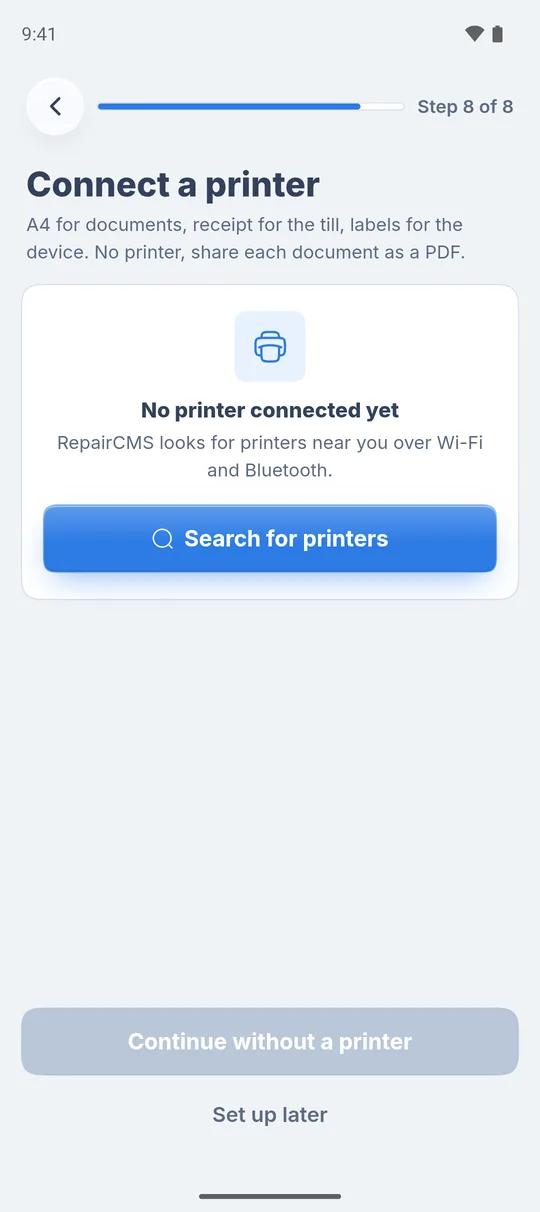
Skip it all: The company name step has “Fill in later”. It takes you straight to the last step. Anything still open then sits on home under “First steps” and under “More” as “Continue setup”.
Changing permissions later: You can change every permission later in your phone’s system settings. In the app they’re under “More”, “Settings”, “App permissions”.
Trial only: invite colleagues. If you started the trial, “Colleagues with their own sign-in” follows. “Invite a member” sends a colleague a link. If you’re starting on your own, tap “Invite later”.
Last step: see what your customer sees
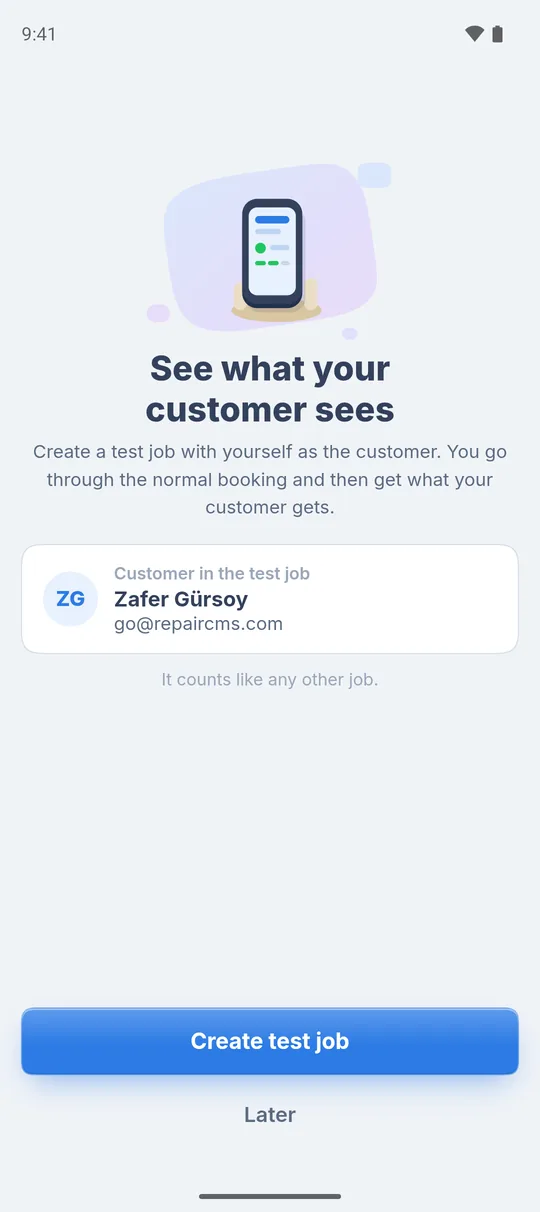
Finally you create a real test job with yourself as the customer. That way you get exactly the email and the page your customer will get later.
- The card “Customer in the test job” shows your name and email. Tap “Create test job”.
- The normal booking opens. You’re already set as the customer, and the top says “Test job”. Go through the steps as described in Book your first repair order and tap “Book a job” at the end.
- The tracking link goes to your own email. Tap “Open tracking portal” and look at the page: status, device, your logo and your opening hours.
- Tap “Finish setup”. You land on home.
If you’d rather do this later, tap “Later”.
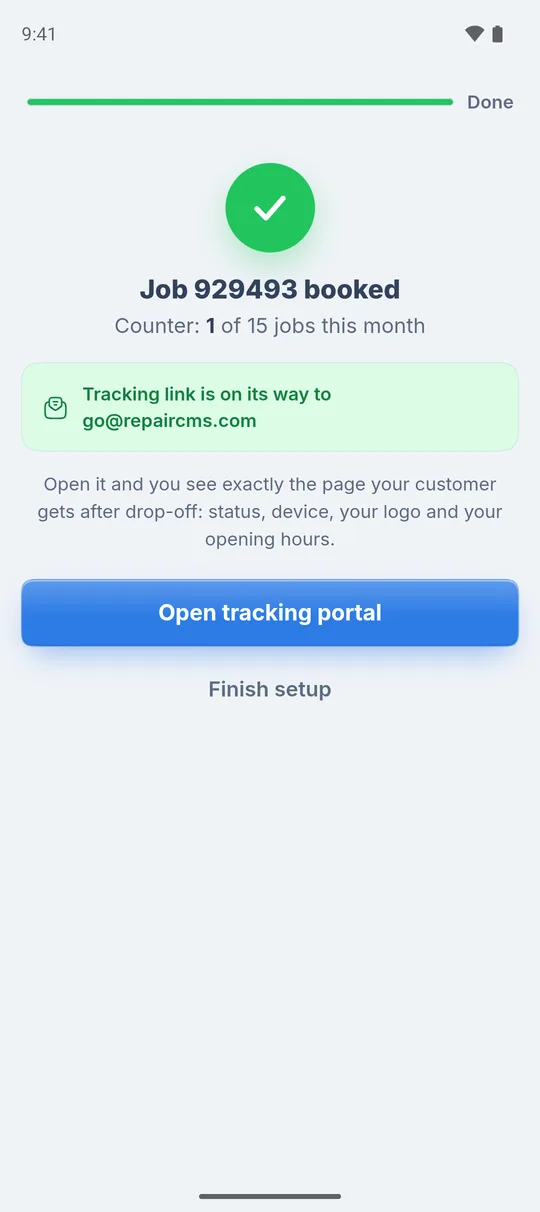
The test job counts: It is a real job and counts like any other. On Go it is one of your 15 jobs a month.
Changing your business details later
- Tap “More” at the bottom.
- Tap “Profile & account”.
- Tap “Business details” and change what you need.
What’s next
- Set up a printer: Connect a printer and print a test page
- Create your first job: Book your first repair order
- What Go includes: RepairCMS Go: what’s included and what isn’t
Frequently Asked Questions
Do I have to enter all business details straight away?
No. You can skip every step. Anything still open is on home under "First steps" and always under "More", "Profile & account", "Business details".
What logo format does the app need?
PNG or JPG, at least 300 pixels wide. The logo then appears on every document and on the device label, and you can change it at any time.
Trial or Go, which should I pick?
The trial shows you everything in the Team plan for 14 days and ends by itself. Go is free with 15 jobs a month. If you start with Go, you can still start the trial later.
Does the test job count towards my 15 jobs?
Yes. The test job is a real job and counts like any other.
Did this guide help you?