
Book your first repair order
On this page · 8 sections
In the RepairCMS app, tap the plus at the bottom and then “Book a job”. Pick “From the price list” for fixed prices or “By device category” for everything else. Then enter device, condition, customer and fault, and tap “Book a job” on the summary. After that you print the job sheet and label.
Before you start
- Your business is set up, see Set up your business and choose a plan.
- You don’t need a printer to print. Without one you share the document as a PDF. To set one up, see Connect a printer and print a test page.
Start the booking
- Tap the plus in the bottom bar.
- Tap “Book a job”.
- Under “How do you want to book?”, pick one:
- “From the price list” (Express): for standard repairs with fixed prices.
- “By device category”: for everything that isn’t on the price list.
On Go, the screen shows how many free jobs you have left this month.
Every new booking starts empty. Nothing from an earlier job is carried over.
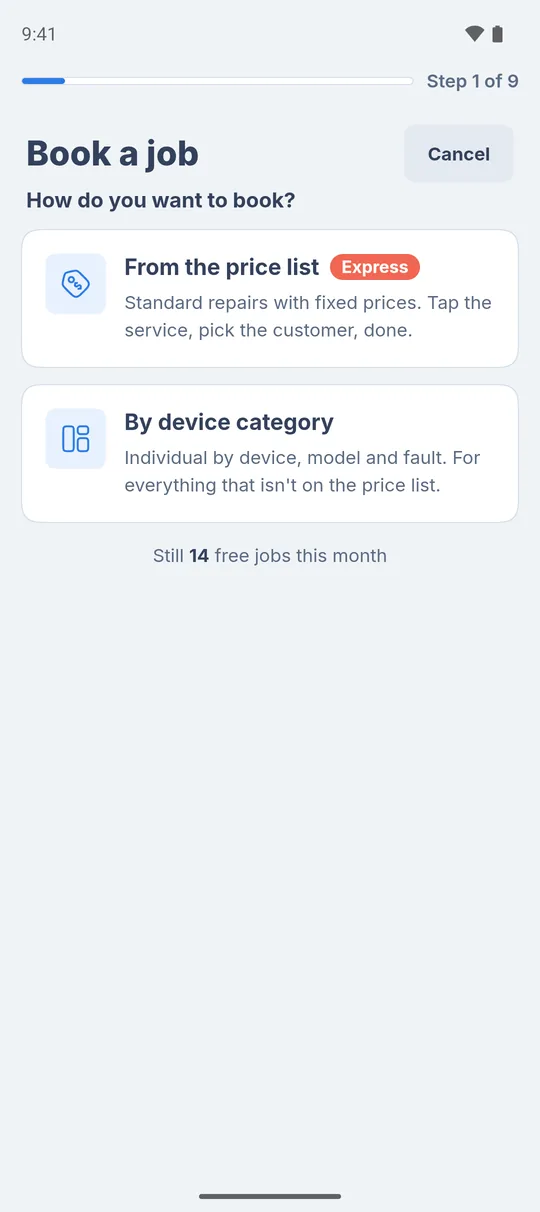
Unfinished booking: If you leave a booking halfway, it waits as a “Draft” card at the top of the same screen next time. Tap it to carry on with everything you entered. If you pick one of the two options instead, a new, empty booking starts.
Option A: From the price list
- Tap one or more services in your “Price list”. The search field finds any service.
- Tap “Create express job”.
- The app jumps to the device details. Brand and model from the service are already filled in. Carry on as in option B from step 2.
If your price list is still empty, you can create a service right there or book by device category.
Option B: By device category
The bar at the top shows which of the nine steps you’re on. “Back” takes you one step back, “Next” one step forward.
- “Choose device type” Tap the device type, for example smartphone, e-bike or coffee machine. The list follows your industry.
- “Device details” Pick “Brand” and “Model”. Type the serial number or IMEI, or tap the scan icon in the field. Which fields appear depends on the device type.
- “Condition and photos” Pick the device’s “Condition” and the “Accessories” handed in. The “Photos of the condition” card is available from Business.
- “Device security” (only for device types with an unlock code) Under “Security / unlock”, enter the device password or draw the pattern. It’s for the function test after the repair and never appears on a document.
- “Contact” Tap “Find or create a customer”. Search by name, company, phone or customer number. For a new customer, tap “+ Create a new customer”.
- “Job type and reference” The “Job type” is set to “Repair”. If something else fits, pick it. If you need a ticket number or an insurance case, tap “+ Reference” and enter it.
- “Problem” Under “Fault”, pick one or more faults. Describe the fault under “Description” in the customer’s words.
- “Organisation” Tap “Add Storage spot”, the spot appears on the device label and the job sheet. “Choose a date” sets the date under “Due on”. “Assign a team member” is available from Team.
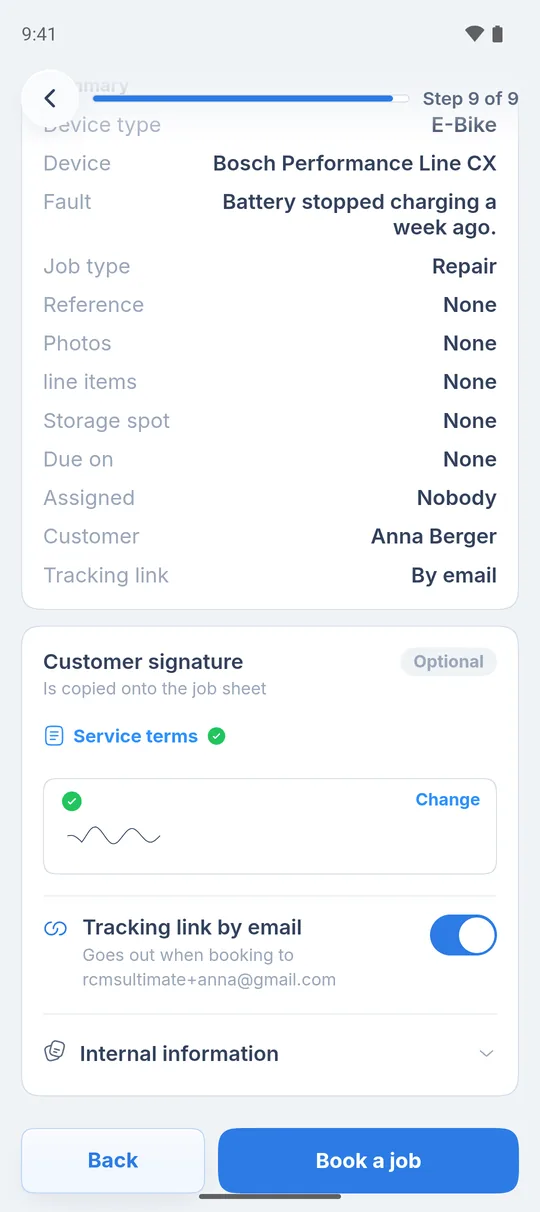
- “Finish” Check the “Summary” and tap “Book a job”.
Suggestions from your jobs: Under “Brand”, “Model”, “Condition”, “Accessories”, “Fault” and “Job type” the app shows up to three suggestions. They are the values your business booked most often in its recent jobs. A tap takes the value. The models follow the brand you picked.
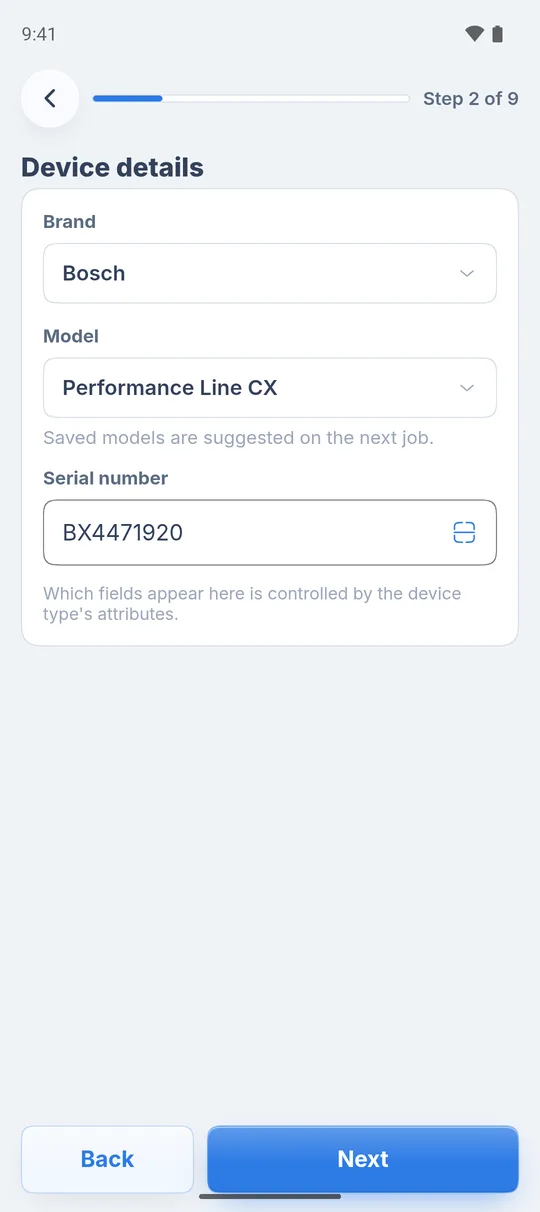
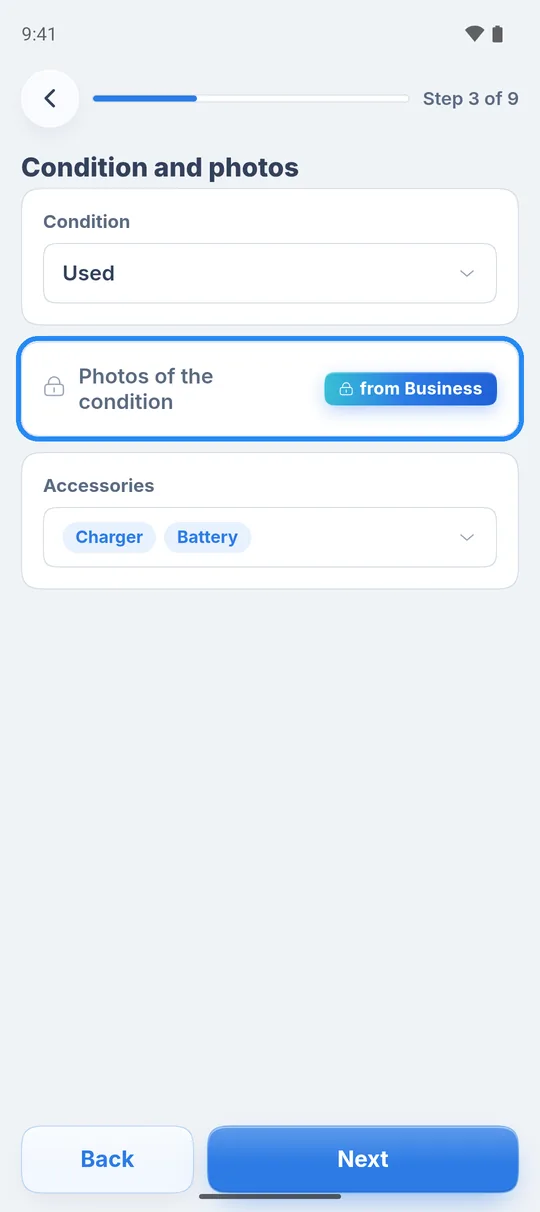
Required: If the device type asks for a condition, you can’t continue on “Condition and photos” without one. On “Contact” you can’t continue without a customer.
Add the customer’s email: Only with an email address does your customer get the tracking link automatically. Without one, the link is on the job sheet and label as a QR code.
On the “Finish” step
Before you tap “Book a job”, three things happen here:
- “Customer signature” (optional) Tap “Sign now”. If you keep service terms on file, the customer reads them first, see below. Then they sign on the screen. The signature is copied onto the job sheet.
- “Tracking link by email” If the customer has an email address, the link goes out when you book. Use the switch to keep it back. If the address is missing, tap “Add”.
- “Internal information” A note for you, for example “customer waiting for a call back”. The customer doesn’t see it.
Read and sign the service terms
If you keep terms for the job sheet, they go with the signature.
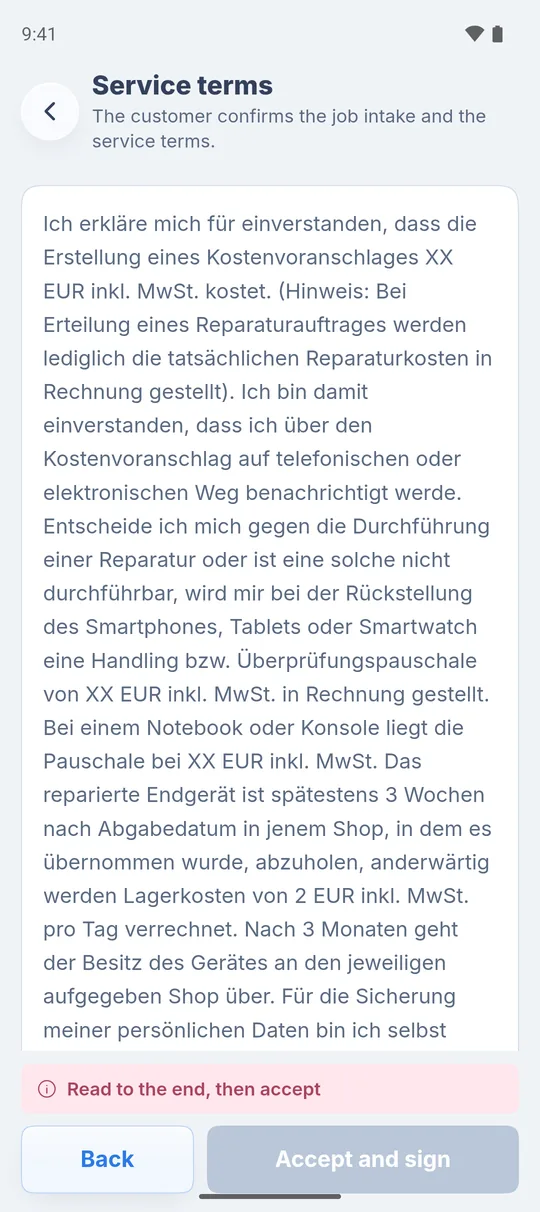
- Tap “Sign now”. The “Service terms” page opens with the line “The customer confirms the job intake and the service terms.”
- Hand the customer the phone. They scroll to the end. Until then the bottom says “Read to the end, then accept”.
- The customer taps “Accept and sign” and signs.
Back on the finish step, “Service terms” shows a green tick. You edit the terms themselves under “More”, “Settings”, “Receipt templates”, in the “Terms” field.
After booking
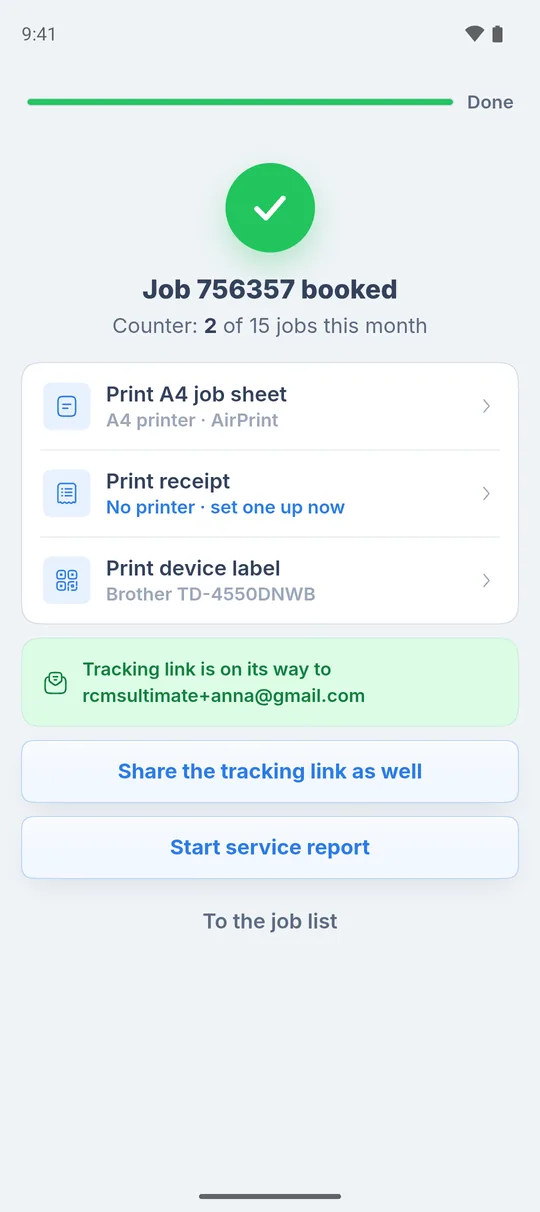
The app shows “Job … booked”. On Go it adds “Counter: … of 15 jobs this month”. From here you go straight on:
- “Print A4 job sheet”
- “Print receipt”
- “Print device label”
- “Share the tracking link”
- “Start service report”
- “To the job list”
If the tracking link went out by email, it says “Tracking link is on its way to …” with the customer’s address. The button then reads “Share the tracking link as well”.
If no printer is connected for receipts or labels yet, it says “No printer · set one up now”. More in Print documents.
Test job from the setup: The first job after setup can be a test job with yourself as the customer. Its success screen shows no print buttons but “Open tracking portal” and “Finish setup”. More in Set up your business and choose a plan.
What’s next
- Print documents: Print documents: job sheet, device label, receipt, service report
- Repair done: Complete a job and hand over the device
- Go limits: RepairCMS Go: what’s included and what isn’t
Frequently Asked Questions
When do I use the price list and when the device category?
The price list is for standard repairs with a fixed price, such as a screen replacement. Use the device category for anything you need to check first or that isn't on the price list.
Can I take photos of the device condition on Go?
Photos on the job are available from Business. On Go you record the condition with the "Condition" choice, the accessories and the description.
Does the customer have to sign at intake?
Tap “Sign now” at the end of the booking and the customer signs on your screen, with the signature printed on the job sheet. If you keep service terms on file, they read them to the end first and tap “Accept and sign”, confirming the job and your terms in one step. It's optional, so you can also book the job without a signature.
What if the customer has no email address?
You can still book the job. The customer then finds the tracking link as a QR code on the job sheet and label.
Did this guide help you?